
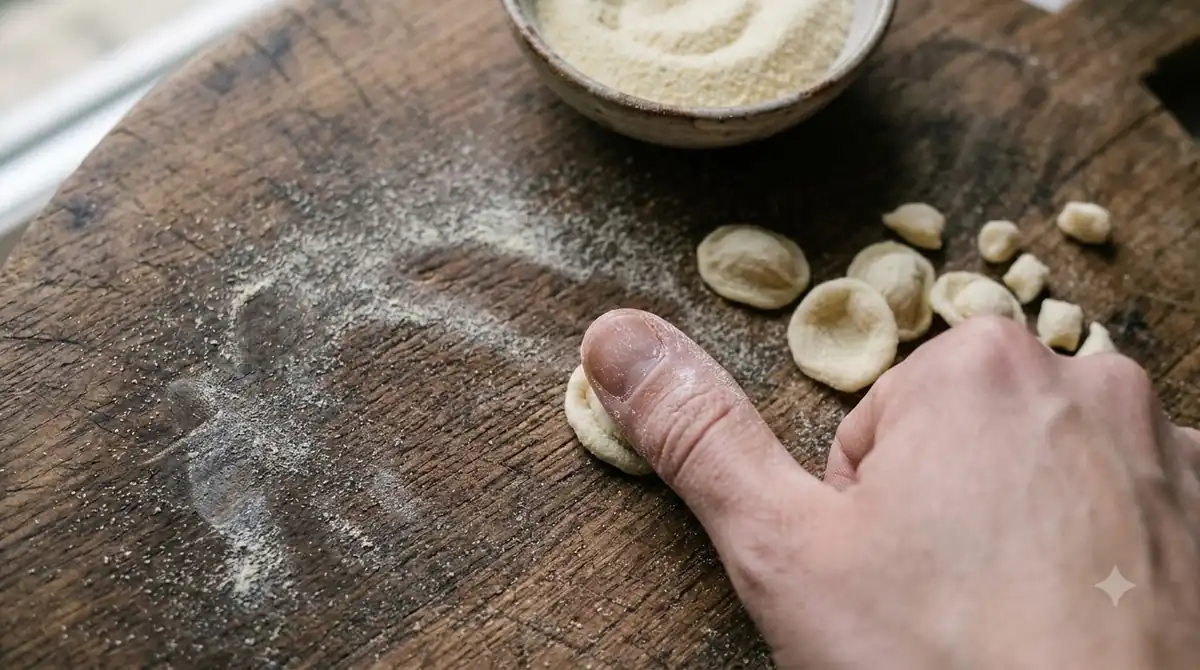

Learning how to use a gnocchi board takes only a few tries. Stand the board upright, press a dough piece against the edge nearest you, and roll it away with your thumb so it picks up ridges. The motion is simple, but pressure and timing take practice.
The grooves give each piece a textured surface that holds sauce well. A dedicated board is not the only option, since a fork or cheese grater can also press ridges into the dough.
What a Gnocchi Board Does to Each Piece
A gnocchi board gives each small dough piece a ridged surface when you roll it across deep grooves. The ridges leave small spaces where sauce can collect.
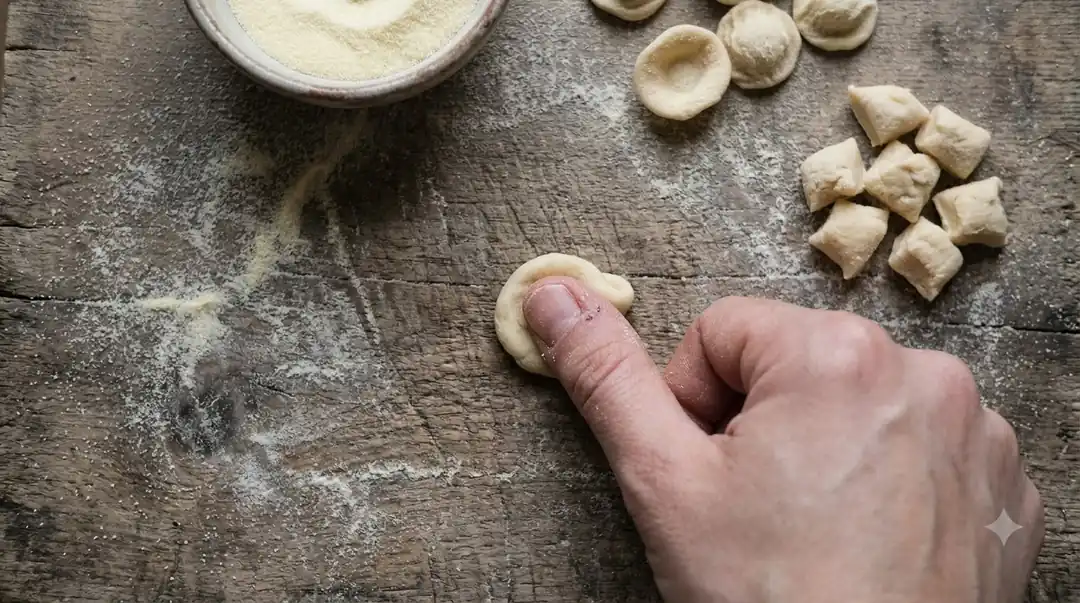
Gnocchi are dumplings made from a dough that is commonly built from wheat flour, potato, egg and salt. Wikipedia’s gnocchi entry describes the dough as rolled out and cut into pieces about the size of a wine cork or smaller before shaping.
Those small pieces are what the board works on. Each piece takes on the ridge pattern from the grooves, so the finished dumpling has more surface for sauce than a smooth one.
Learning how to use a gnocchi board starts with one idea: the grooves set the ridge pattern, and your thumb only guides the dough across them. Once that clicks, the steps below make sense.
Step-by-Step: How to Use a Gnocchi Board
To use a gnocchi board, orient it vertically, place one piece against the edge closest to you, press gently with your thumb, and roll the dough away along the grooves.
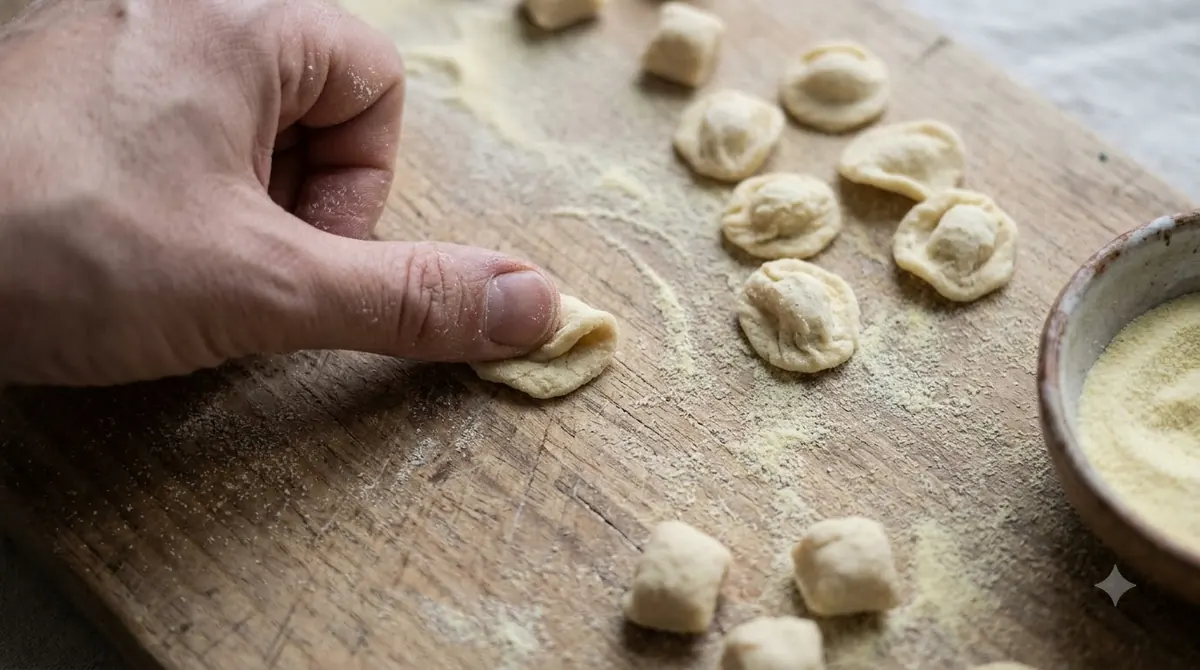
- Orient the board vertically on the counter.
- Place one dough piece against the edge of the board that is closest to you.
- Press gently with your thumb so the piece stays against the board.
- Roll the dough away from you along the grooves, so the ridges form on the piece.
- Stop when the piece is covered in ridges and pops out from under your thumb.
- Repeat with every piece, and set finished ones aside in a single layer so they stay separate.
The walkthrough in Tasting Table’s gnocchi board guide adds two details. Many cooks raise one side of the board slightly to make a gnocchi slide while they work, and some boards come with a handle.
Practice on a few pieces first. Your first tries show whether the pressure is right, which matters more than speed when you are still learning how to use a gnocchi board.
Sizing the Dough Pieces Before Shaping
Before you practice how to use a gnocchi board, cut the dough into pieces about the size of a wine cork or smaller, because that is the size the gnocchi description uses as its reference.
Pieces that are too large are harder to press against the board with one thumb, and they are harder to roll evenly across the grooves. Cut them to a similar size so each one takes the ridges the same way and cooks at a similar pace.
The sources we read do not give dough ratios. Use a tested recipe, such as our potato gnocchi recipe, that lists the flour, potato and egg amounts, and follow its quantities rather than guessing from the board. Sizing is the step that decides how even the batch looks, so it deserves the same care as the shaping itself.
Common Mistakes When Shaping on a Board
The most common mistakes in how to use a gnocchi board are pressing too hard, starting from the far edge, and cutting pieces larger than a wine cork. Each one changes how the ridges form.
- Pressing hard instead of gently. The walkthrough asks for a gentle thumb press, not force.
- Starting at the far edge. The dough should begin at the edge closest to you.
- Rolling across the grooves instead of along them, which blurs the ridge pattern.
- Cutting pieces larger than a wine cork, which makes each piece harder to press and roll.
- Lifting a piece before it has picked up ridges all over, instead of waiting for it to pop out from under the thumb.
Knowing how to use a gnocchi board well is mostly about rhythm. Once the first few pieces look even, the same motion works for the rest of the batch.
Wood or Plastic: What Changes When You Handle the Board
Wood is the more traditional material for a gnocchi board, while plastic boards are lighter, according to Tasting Table. Your choice changes how the board feels in the hand and on the counter.
| Feature | Wood board | Plastic board |
|---|---|---|
| Tradition | Described as the more traditional choice | Not described as traditional |
| Weight | Not stated; plastic is described as the lighter of the two | Described as lighter, which some cooks find more convenient |
| Base | A beech board listing says its angled base keeps the board steady | No base design stated in the sources we read |
| Handle | Some boards have one | Some boards have one |
The sources we read did not give board dimensions for either material. Compare the length and width on the product page before you buy, and check them against your counter space. Our best gnocchi boards roundup compares options.
Choose the material with the way you plan to use a gnocchi board in mind. A cook who makes gnocchi often may value the traditional feel of wood, while a cook who wants a lighter tool may prefer plastic.
Cleaning and Storing Your Gnocchi Board
Care is part of how to use a gnocchi board over time. The beech board listing we read did not state care steps, so follow the maker’s care instructions for the material your board is made from. Where the instructions are missing, scrape off dried dough before you wash the board, because dough that dries in the grooves is harder to remove.
Dry the board fully before you put it away. Keeping the grooves clean and dry protects the part you use every time, and a damp board stored flat can hold moisture where the ridges are.
Using a Fork or Grater When You Have No Board
A fork or a cheese grater can press ridges into gnocchi when you do not have a dedicated board, according to the Wikipedia entry. Each tool gives a different pattern, so the choice depends on the look you want.
| Tool | Where the ridges come from | How to use it |
|---|---|---|
| Gnocchi board | Grooves built into the board | Roll each piece along the grooves with a gentle thumb press |
| Fork | Tines pressed into the dough | Press each piece against the tines, then lift it off gently |
| Cheese grater | The textured side of the grater | Press each piece onto the textured surface and roll it slightly |
A dedicated board gives the most regular ridges, because the grooves are the same on every piece. If you are weighing how to use a gnocchi board against a fork, the board is the better choice for a large batch, and a fork is workable for a small one.
What the Sources Do Not Confirm
Several details that matter for how to use a gnocchi board are missing from the sources we read: board dimensions, dough ratios and cooking times for gnocchi. Those details need checking elsewhere. Treat any number you see without a source as unverified.
Check the board’s packaging or product page for size and care. Use a tested recipe for the dough quantities, and follow the recipe or the pasta package for the cooking time, or see how to cook gnocchi. Before you rely on a product page for how to use a gnocchi board, confirm that the listing states the details you need.
Frequently Asked Questions
Can I use a gnocchi board for other shapes?
Yes, according to one beech board listing we read. It names gnocchi, garganelli, cavatelli and gnocchetti sardi as shapes the board makes, and it includes a wooden garganelli roller. Check the product you own for its own list of shapes before you cook.
Do I need a gnocchi board to make ridged gnocchi?
No. The Wikipedia entry notes that a fork or cheese grater can press ridges into the dumplings. A dedicated board gives you grooves already built in, so the ridge pattern comes from the board itself.
How do I know when a piece is finished?
A piece is finished when it is covered in ridges and pops out from under your thumb, according to Tasting Table’s walkthrough. That is the only sign of doneness the article gives, so keep rolling until it happens on the gnocchi board.
Is a wood board better than a plastic one?
Neither source names one as better. Wood is described as the more traditional choice, and plastic is described as lighter and more convenient for some cooks. Pick the material that suits how you store and handle the board.
What size gnocchi board should I buy?
The sources we read do not give board dimensions, so no size can be recommended from them. Check the product page for length and width before buying, and compare that size with your counter space and the size of your dough pieces.
Start with a small batch so you learn how to use a gnocchi board before shaping a full tray. If you make gnocchi only now and then, a fork or grater can give you ridges too. A dedicated board becomes worth it when you cook gnocchi often enough to notice the difference. Pair the ridged pieces with a sauce from best sauces for gnocchi.
 8 min readGear & PantryGnocchi Board: How to Choose and Use OneUpdated Nov 16, 2026
 7 min readGear & PantryPasta Board: How to Choose, Use and Care for OneUpdated Nov 15, 2026
 7 min readGear & PantryHow to Use a Pizza Cutter: Step-by-Step Guide for Clean SlicesUpdated Nov 10, 2026
 9 min readGear & PantryHow to Use a Ravioli Mold: Step-by-Step GuideUpdated Nov 10, 2026
 8 min readGear & PantryHow to Use a Wooden Pizza Peel: Step-by-Step GuideUpdated Nov 10, 2026
 9 min readGear & PantryHow to Use a Ravioli Maker: Step-by-Step for Dough and FillingUpdated Nov 10, 2026