
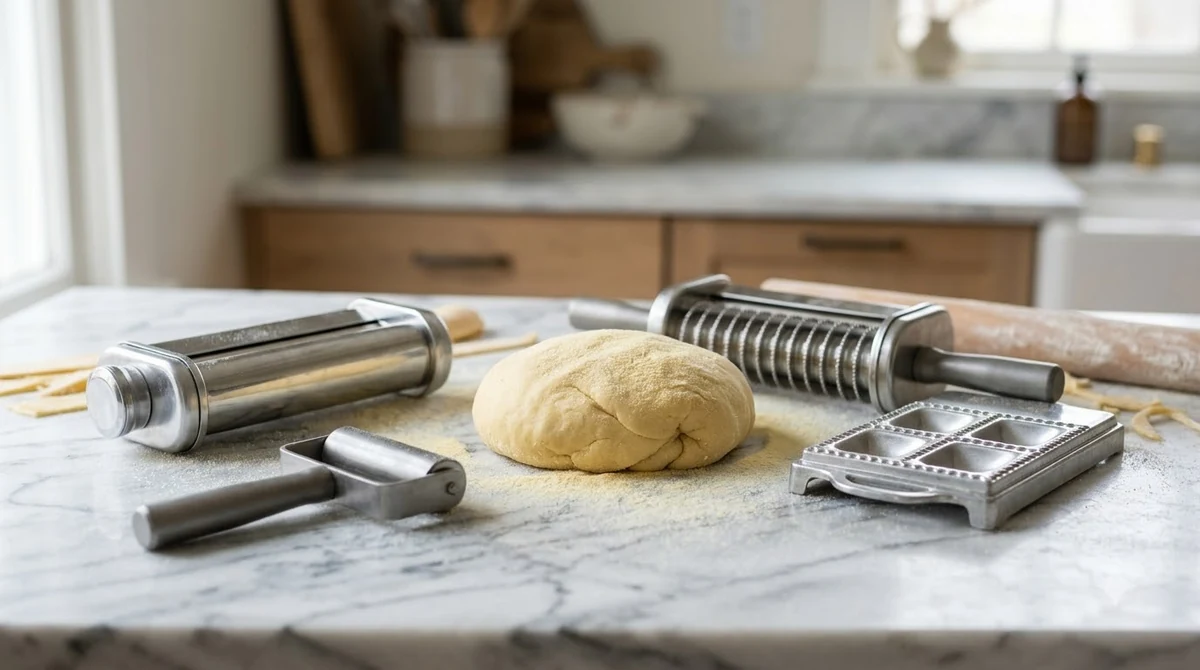

A ravioli mold is a hand tool with a grid of shaped cavities that presses a thin pasta sheet, holds a spoonful of filling in each pocket, and seals and cuts the ravioli in one motion. It is the simplest way to make many ravioli of the same size at home. Dough choice and dusting decide whether the pasta tears or sticks, so the method matters as much as the tool.

Bellemain Ravioli Mold & Press
Pros & ConsViewHide
Reasons to buy
- Metal cutting frame cuts and seals the ravioli in one press, per the listing
- Makes 12 uniform 1-inch square ravioli at a time
- 75% of the 6K+ Amazon ratings are 5-star
Reasons to avoid
- 1-inch squares are small, so fillings must be used sparingly
- Needs flour dusting and a firm press to release cleanly

Geetery 5 Pcs Ravioli Mold Set 2 Inch Square
Pros & ConsViewHide
Reasons to buy
- Set includes a 12-hole mold, rolling pin and three cutting tools (round, square, wheel)
- Each hole is about 2 x 2 inches, a good size for filled ravioli
- 80% of Amazon ratings are 5-star
Reasons to avoid
- About 300 ratings, a shorter track record than older brands
- Larger set with several pieces to wash and store

CucinaPro Ravioli Mold with XL 2.5 Inch Squares
Pros & ConsViewHide
Reasons to buy
- Extra-large 2.5-inch squares, bigger than most molds
- Makes 10 ravioli per press and includes a tray and press
- 78% of Amazon ratings are 5-star
Reasons to avoid
- Fewer ravioli per batch than a 12-hole mold
- Large squares need more filling and dough per batch

Ravioli Maker Press, Ravioli Cutter
Pros & ConsViewHide
Reasons to buy
- Made of food-grade BPA-free plastic with a cutting wheel, according to the listing
- Press is usable on both sides, with grooved edges for cutting
- Makes 8 square ravioli per press
Reasons to avoid
- Plastic build may feel less sturdy than metal frames
- Only 8 ravioli per batch, so large meals need several rounds

Fantes Ravioli Maker Stamp Set
Pros & ConsViewHide
Reasons to buy
- Sturdy aluminum frame with a wooden handle and fluted edge
- Cuts and seals 2.75-inch square ravioli in one press
- Compact, easy to store, and low priced
Reasons to avoid
- Stamps one ravioli at a time, slower for big batches
- Hand-wash only, per the listing
What a Ravioli Mold Does
A ravioli mold does the shaping work that would otherwise take a knife, a fork and a lot of patience. You lay a rolled sheet over the cavities, add filling, cover with a second sheet, and press. Each pocket becomes one sealed piece of pasta. Ravioli are defined as a type of stuffed pasta with a filling enveloped in thin pasta dough, and they are usually served in broth or with a sauce. According to Wikipedia’s entry on ravioli, the dish appears in the 14th-century cookbook The Forme of Cury under the name “rauioles,” so the stuffed-pasta idea is centuries older than any kitchen tool made for it.
Most ravioli are square, although circular and semi-circular shapes are also common, and our guide to tortellini vs ravioli shows how they differ from other filled pasta. A mold fixes the shape and the size, which is why cooks use one when they want a batch of identical pieces. The cavities in a ravioli mold set the size of each ravioli, so the count per batch depends on the mold you buy, not on a standard that applies to every brand.
A ravioli mold is different from a simple cutter (see our guide to the types of ravioli cutters). A cutter only trims shapes from a flat sheet, while a mold also forms the pocket and seals the edges around the filling. Some home kits include a wooden rolling pin, which helps press the top sheet down into the cavities. Check whether your set includes one before you plan the batch.
Dough and Filling Amounts
A common home dough uses 2 cups of flour and 3 eggs, rested at least 30 minutes before rolling. King Arthur Baking’s cheese ravioli recipe gives the most exact amounts we could read, and it works as a starting point for any ravioli mold. For more on the dough and fillings for a ravioli mold, see our guide to homemade ravioli. For the filling and pressing steps, see our guide to filling and pressing a ravioli mold.
| Component | Amount | Notes |
|---|---|---|
| All-purpose flour | 2 cups (240 g) | Plus extra for dusting |
| Pasta flour blend | 2 cups (290 g) | Alternative to all-purpose |
| Eggs and salt | 3 large eggs, 1/2 tsp table salt | Eggs at room temperature |
| Cool water | 1 tbsp (14 g), optional | Add only if the dough is dry |
| Ricotta filling | 2 cups (454 g) ricotta | With 56 g Parmesan and 30 g flour |
Rest the dough at room temperature for at least 30 minutes, or refrigerate it for up to overnight. Refrigerated dough needs about 30 minutes at room temperature before you roll it. The dough should feel “not dry and not sticky,” as The Burnt Butter Table advises in its guide to using a ravioli mold.
Roll only a portion of the dough at a time. The same guide suggests rolling one sixth or one quarter of the dough per batch so the rest stays covered and does not dry out. On a standard pasta machine, King Arthur sets the sheet to setting #8, which it lists as 0.6 mm thick, and trims the sheet to about 4 3/4 inches wide before filling. If you are new to rolling sheets, read our guide on how to use a pasta machine first.
For filling, a simple ricotta mix works well with most molds. The King Arthur recipe uses 2 cups of ricotta, 1/2 cup plus 1 tablespoon of grated Parmesan, 1/4 cup of flour to help the filling hold its shape, chopped herbs, pepper, salt and a little nutmeg. Keep the filling drier rather than wetter. Excess liquid is the most common reason a sealed ravioli bursts while it cooks.
How to Use a Ravioli Mold
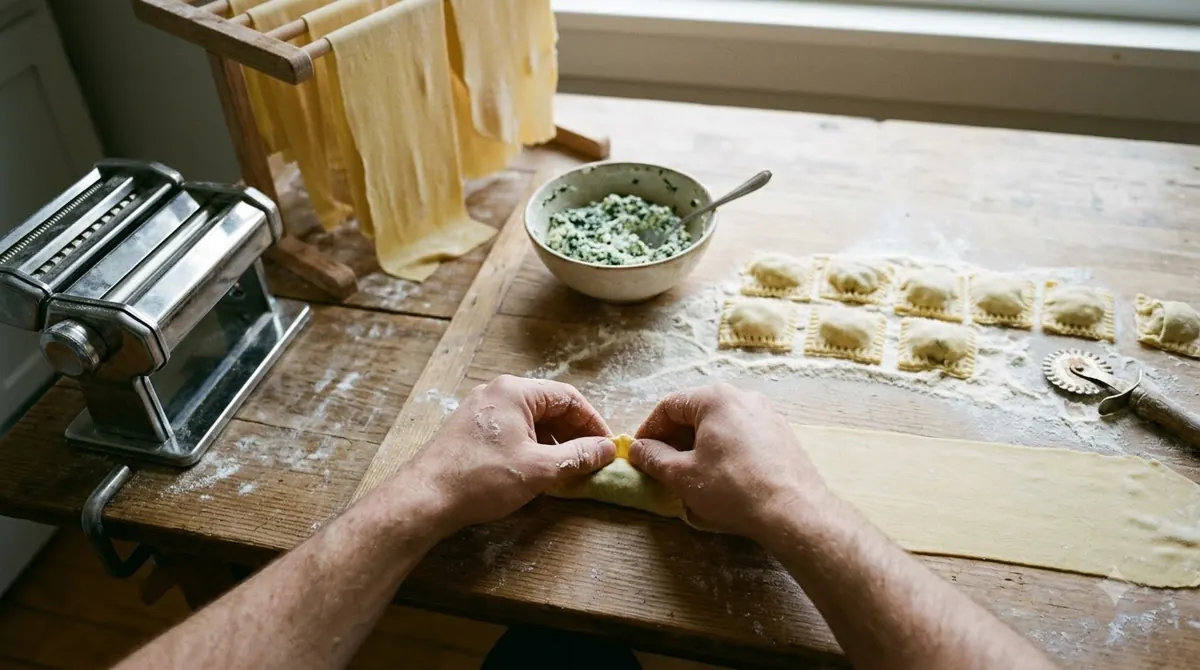
Using a mold is a short sequence of steps, and the order matters. Roll the dough, cut two sheets larger than the mold, dust one of them, press it into the cavities, fill, cover with the second sheet, and press the mold onto the board. The method below follows the published steps for using a ravioli mold from The Burnt Butter Table.

The basic routine looks like this:
- Roll a sheet of pasta on a wooden board, lay the mold on it, and cut two pieces about 2 cm larger than the mold all the way around.
- Dust one piece well with flour, rubbing it over the surface. Set the other piece aside unfloured.
- Place the floured piece, floured side down, on the mold, and push it into the indents with a pastry brush or your fingers.
- Spoon or pipe filling into each cavity, then press it level with the back of a teaspoon or a finger.
- Place the unfloured sheet on top and roll gently over it with a rolling pin, without much pressure.
- Flip the mold onto the board, press down firmly, hold a corner of the overhanging pasta, and ease the mold off.
- Trim the edges, cut between the pieces, and place the ravioli on a parchment-lined tray dusted with semolina.
A piping bag gives cleaner filling than a spoon, but a teaspoon also works. The main goal is to keep filling away from the edges, because any filling on the seal stops the pasta from closing.
Sealing the edges
A good seal depends on water and air. King Arthur’s method brushes a thin layer of cool water along the bottom edge and around each mound, folds the top sheet over, matches the edges, and presses the air out from the center outward. Press gently so the pasta joins without tearing.
Cut the pieces with a fluted pastry wheel or a knife after the mold is removed. Work in batches, because dough that dries on the counter becomes brittle and splits at the seal.

How to Choose a Ravioli Mold
Choose a ravioli mold by cavity size, material, whether a rolling pin is included, and how simple it is to clean. Those four points matter more than the brand name on the box.
- Cavity size. Read the listed size of each pocket, and decide whether you want small pieces for appetizers or larger ones for a main course. A mold with many small cavities gives more pieces per batch, but each piece is smaller.
- Material. Wooden molds are described as hand-made, and a wooden mold can suit a home kitchen. Metal and plastic molds are common in retail listings. Confirm the material on the product page before you buy.
- Rolling pin. Some sets include a wooden pin for pressing the top sheet into the cavities. Make sure the set includes one if you do not own a pin you can use.
- Cleaning. Choose a mold you can dust off and wash quickly. A mold you must soak is harder to keep in good condition.
Commercial ravioli molds are built for production kitchens and differ from home sets in size and throughput. If you cook for a family or for weekend guests, a home mold is usually enough. Listing prices, cavity counts and dimensions change, so verify them on the seller’s page before you order. If you would rather use an attachment, read our ravioli maker buying checks.
Common Mistakes When Using a Ravioli Mold
Most failed batches come from flour on the ravioli mold, dough that is too dry or too sticky, or filling that spills onto the seal. Each problem is easy to avoid once you know what to look for.
- Dusting the mold. Flour on the mold does not help the pasta release. Dust the pasta sheet instead, because flour will not stick to wood or metal.
- Using dough that is too dry. Dry dough cracks at the seal. Add a little cool water only if the dough is dry.
- Overfilling the cavity. Too much filling pushes the top sheet apart. A measured spoonful, such as the 1-tablespoon portion in the King Arthur recipe, is a safe starting point.
- Refrigerating finished ravioli. The Burnt Butter Table notes that fridge storage makes ravioli sticky. Leave them loosely covered at room temperature for up to an hour before cooking.
- Skipping the test cook. Cooking time depends on how thick the pasta is, so check one ravioli after about 5 minutes.
Cooking and Cleaning After the Batch
Cook the ravioli in heavily salted boiling water. King Arthur gives 6 to 8 minutes for ricotta ravioli, flipping them every couple of minutes, and notes that frozen ravioli may need a couple of extra minutes. Lift them out with a slotted spoon once they are fully cooked through.
Cleaning a ravioli mold is simple if you act right away. Dust off the mold while the pasta residue is dry. If it needs more, wash it lightly in soapy water and dry it immediately. Do not soak it. The same guide says to dry the mold right after washing.
Serve the ravioli with a sauce that suits the filling. A ricotta filling pairs well with a warm marinara or alfredo spooned over the top, or with a drizzle of good olive oil, grated Parmesan and chopped basil.
Frequently Asked Questions
Is a ravioli mold the same as a ravioli cutter?
No. A cutter trims shapes from a flat sheet, while a mold forms pockets and seals the filling in the same press. A cutter can make a ravioli, but a ravioli mold also shapes the pocket. If you choose a cutter, see our guide to using a ravioli cutter step by step.
Do I need a pasta machine to use a mold?
No. The mold method works with dough rolled by hand or by machine. A pasta machine helps you reach an even thickness quickly, and King Arthur’s setting #8 gives 0.6 mm as one reference point.
How long do ravioli take to boil?
King Arthur gives 6 to 8 minutes in heavily salted water for ricotta ravioli. The Burnt Butter Table advises checking one ravioli after about 5 minutes, because thickness changes the time.
Why does my pasta stick to the mold?
The most common cause is dusting the mold instead of the pasta, or dough that is too sticky. Dust the sheet that goes face down on the mold, and keep the dough dry enough to release cleanly.
How many ravioli does one batch make?
It depends on the mold. King Arthur’s standard square cutter recipe yields 28 to 30 ravioli about 2 1/4 inches square, and its heart-shaped version yields about 18. Count the cavities on your own ravioli mold to plan a batch.
A ravioli mold is a practical tool for a home kitchen that makes many ravioli. Dust the pasta, not the mold, keep the dough dry enough to release cleanly, and check the cavity size and material on the product page before you buy.
 9 min readGear & PantryHow to Use a Ravioli Mold: Step-by-Step GuideUpdated Nov 10, 2026
 9 min readGear & PantryRavioli Cutter Guide: Types, Sizes and How to Use OneUpdated Nov 10, 2026
 8 min readGear & PantryHow to Use a Ravioli Stamp at HomeUpdated Nov 10, 2026
 9 min readGear & PantryHow to Use a Ravioli Maker: Step-by-Step for Dough and FillingUpdated Nov 10, 2026
 8 min readGear & PantryHow to Use a Ravioli Cutter at HomeUpdated Nov 10, 2026
 8 min readGear & PantryPasta Cutter Guide: 3 Types, Blades and How to Use OneUpdated Nov 10, 2026